Cone flat pattern formula and how to lay it out
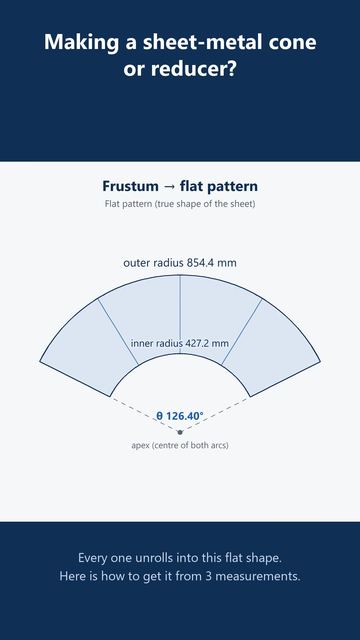
A cone or truncated cone (frustum) unrolls into a flat annular sector: a band between two arcs that share one centre, the cone's apex. You need three numbers to draw it: the outer radius L, the inner radius ℓ and the sweep angle θ. They come from the two diameters and the height.
The flat pattern formulas
With large-end diameter D (radius R = D/2), small-end diameter d (radius r = d/2) and vertical height H between the ends:
The reasoning is short. Rolled up, the outer arc becomes the large-end circle, so its length L × θ (in radians) must equal π × D. The cone's sides are straight lines through the apex, so by similar triangles L ÷ R = s ÷ (R − r): the slant distance to the apex grows in proportion to the radius. Put those together and the three formulas above drop out. A full cone is the case r = 0: the inner radius is zero and L = s. When D = d the "cone" is a cylinder, and the pattern is a rectangle π × D long.
Worked example: a 16 in to 8 in reducer, 10 in tall
- R = 8 in, r = 4 in, so R − r = 4 in.
- s = √(10² + 4²) = √116 = 10.770 in.
- L = 10.770 × 8 ÷ 4 = 21.541 in.
- ℓ = 10.770 × 4 ÷ 4 = 10.770 in (and L − ℓ = s, as it should).
- θ = 360° × 4 ÷ 10.770 = 133.70°.
- Check: L × θ in radians = 21.541 × 2.3335 = 50.265 in, and π × 16 = 50.265 in. The outer arc is exactly the large-end circumference.
The straight distance across the ends of the outer arc (the chord) is 2 × L × sin(θ/2) = 39.612 in. Laid out symmetrically about a centreline, the pattern occupies a rectangle that wide and L − ℓ × cos(θ/2) = 17.306 in deep, which is the first thing to check against your sheet.
- cut line
The calculator does the same working for any size, in inches or millimetres, and prints the pattern full size on A4 or Letter paper, with DXF and SVG files for cutting.
Open this reducer in the cone calculatorMarking it out with a trammel
- Draw a straight centreline on the sheet and mark the apex point near one end. Allow L (21.54 in here) of clear sheet beyond it.
- With a trammel or a tape and scriber, swing the outer arc at radius L and the inner arc at radius ℓ about the apex.
- Set off the sweep with the chord rather than a protractor: from the point where one seam line (say the centreline) crosses the outer arc, measure the straight chord 2 × L × sin(θ/2) = 39.612 in to a second point on the outer arc. The line from the apex through that point is the other seam line. A protractor set to θ = 133.70° does the same, less accurately on a large pattern.
- Check the outer arc length with a flexible rule: it should be π × D = 50.27 in.
- Add any seam (lap) allowance outside one or both seam lines, and any end allowance outside the arcs, before you cut.
When the radius is too long to swing: chord offsets
Shallow cones have long radii (a nearly flat cone's apex can be metres away), so swinging the arc is impractical. Instead, draw the outer chord, mark equal stations along it, and set off the arc at each station by a perpendicular offset. For an arc of radius ρ with half-chord c, the offset at distance x from the chord's midpoint is √(ρ² − x²) − √(ρ² − c²). For the example (eight equal spaces):
| Station | Along the outer chord | Offset to outer arc | Along the inner chord | Offset to inner arc |
|---|---|---|---|---|
| 0 | 0.000 | 0.000 | 0.000 | 0.000 |
| 1 | 4.952 | 7.131 | 2.476 | 3.565 |
| 2 | 9.903 | 10.661 | 4.952 | 5.330 |
| 3 | 14.855 | 12.495 | 7.427 | 6.248 |
| 4 | 19.806 | 13.072 | 9.903 | 6.536 |
| 5 | 24.758 | 12.495 | 12.379 | 6.248 |
| 6 | 29.709 | 10.661 | 14.855 | 5.330 |
| 7 | 34.661 | 7.131 | 17.330 | 3.565 |
| 8 | 39.612 | 0.000 | 19.806 | 0.000 |
The inner chord runs parallel to the outer one, 4.234 in closer to the apex, centred on the same centreline. Bend a thin batten through the offset points to draw each arc. The calculator's results include the same table for any size, with as many stations as you need.
Sweep angle from the cone's angle
If you know the cone's half-angle α (between the side and the axis) instead of the height, θ = 360° × sin α. A 300 mm full cone 400 mm high has tan α = 150 ÷ 400, so α = 20.56° and θ = 126.40°, with slant height (and pattern radius) 427.2 mm. The steeper the cone, the smaller the slice of a circle its pattern takes.
Which diameter? Inside, outside or mean
For thin sheet it hardly matters. For plate, lay the pattern out on the mean diameter (mid-thickness), because the inside of the bend compresses and the outside stretches. Inside diameter + thickness, or outside diameter − thickness, gives the mean. The cone calculator explains when this matters and does the conversion when you tell it which face you measured.
Import a full-size cone DXF: a verified example
This separate sample is a 600 mm to 300 mm reducer, 400 mm tall, with dimensions at mid-thickness and no added seam allowance. Its flat pattern has outer radius 854.400 mm and inner radius 427.200 mm. Download the DXF pattern, SVG pattern or tiled A4 PDF.
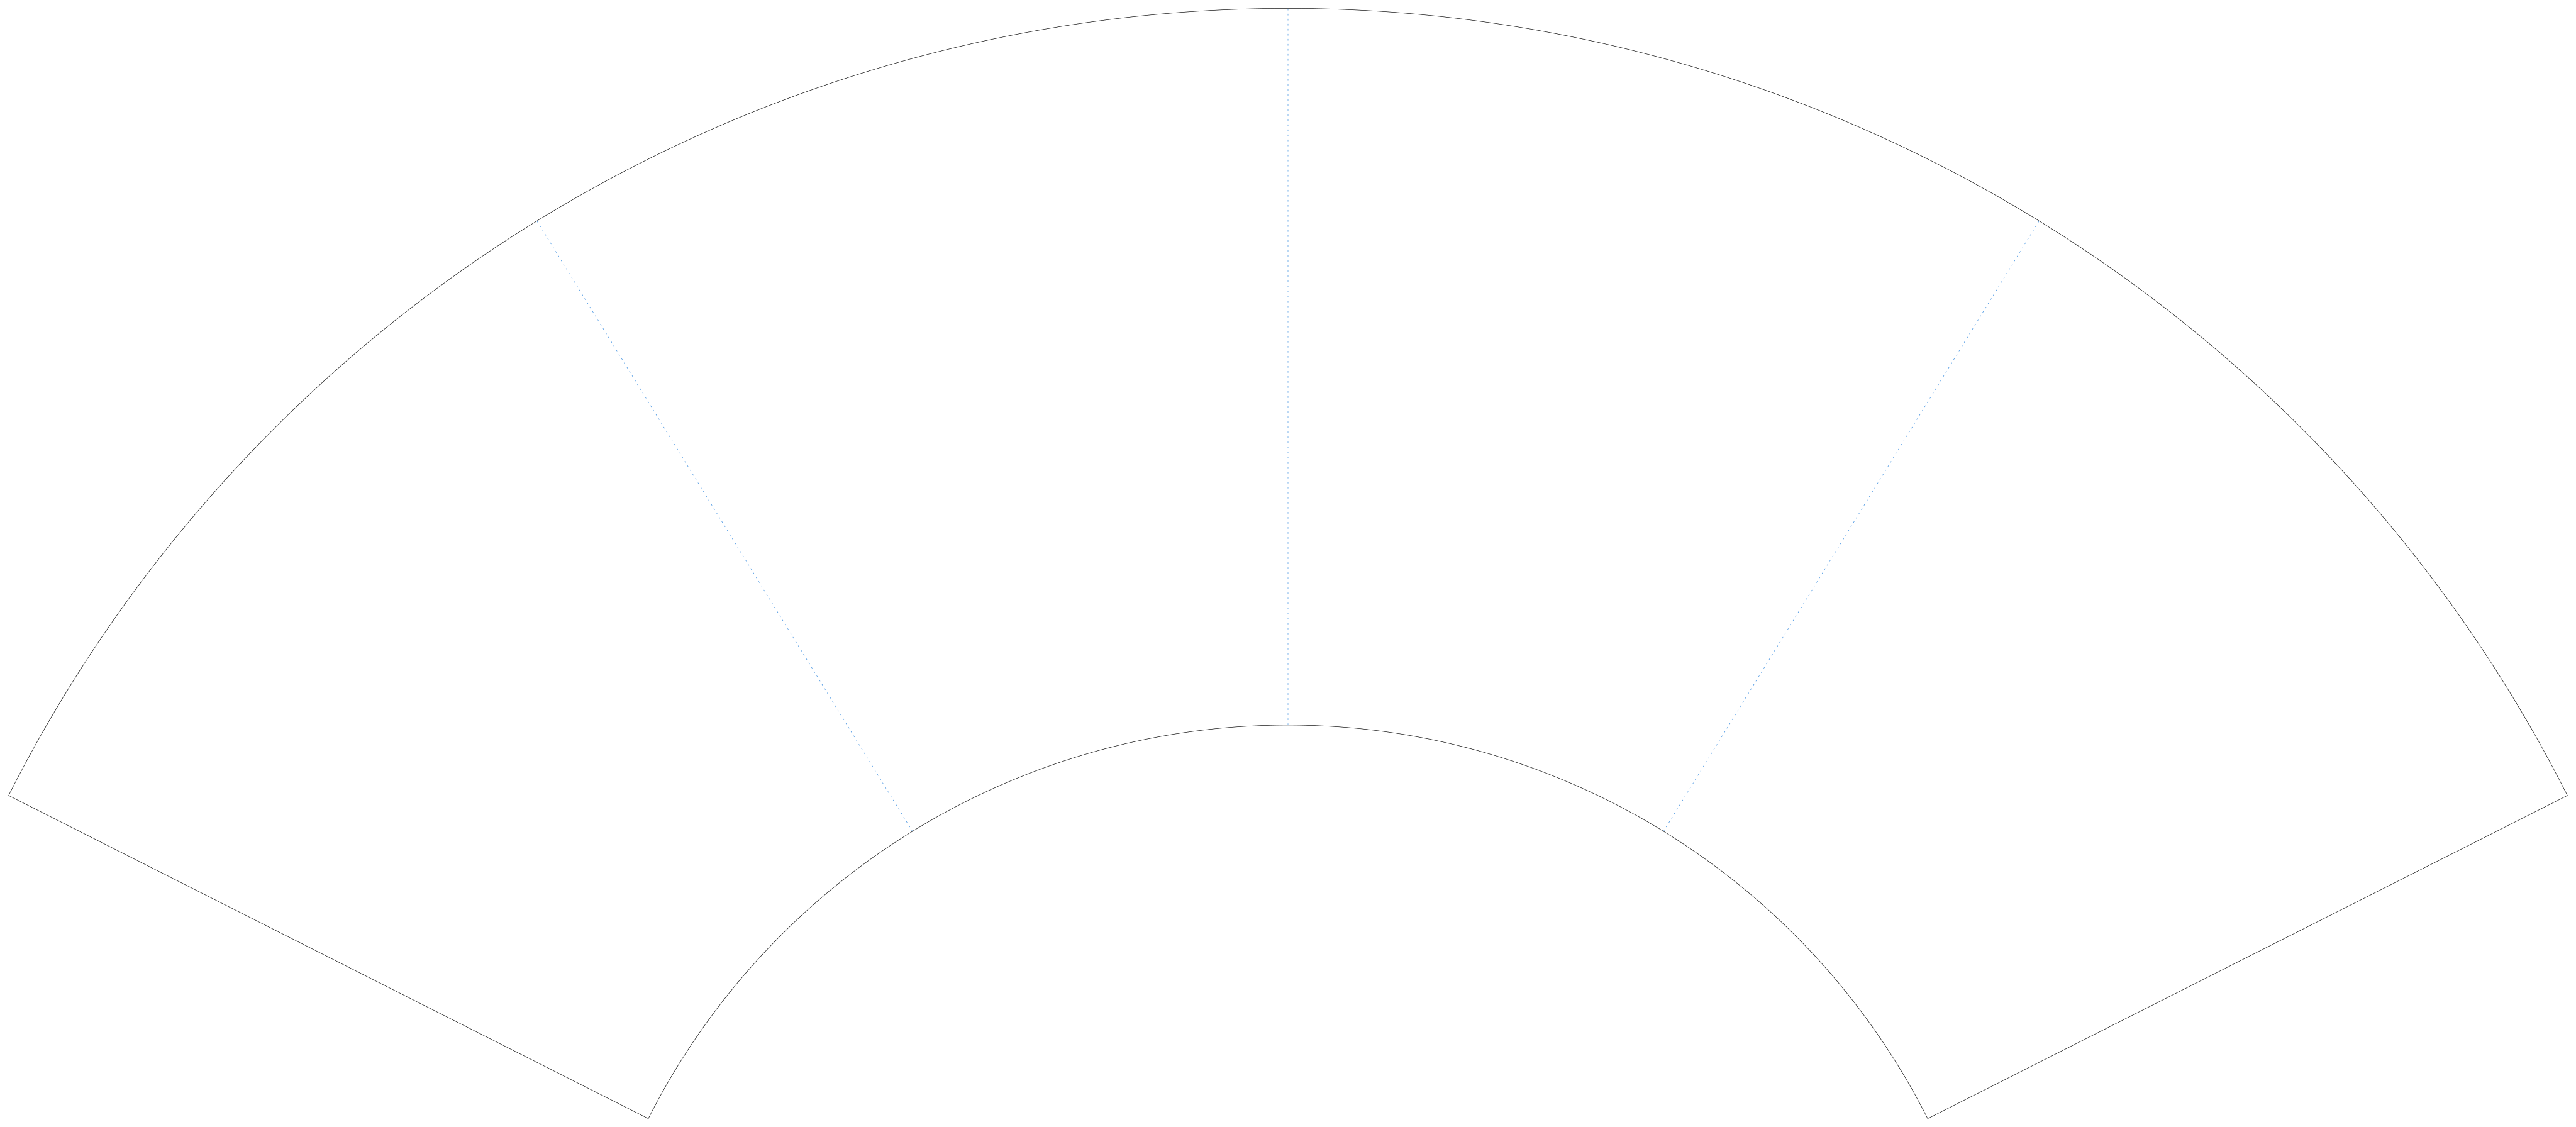
- Open the DXF in your drawing or cutting application. This file declares millimetres and uses DXF arcs for the two curved edges. If the importer asks for units, choose millimetres.
- Check the imported arc radii against 854.400 mm and 427.200 mm before arranging the job. A page boundary or cutting-bed boundary is not a scale reference.
- In Inkscape, zoom to the drawing and resize the page around the drawing if needed, keeping the geometry at its imported size. The default A4 document is smaller than this pattern; shrinking the drawing to fit A4 would change the finished reducer.
- Inspect cut and marking geometry separately. The source DXF uses CUT for the outline and MARK for the roll guides. Keep construction marks out of a through-cut operation. Layer handling depends on the importing application.
- For a paper pattern, use the tiled PDF at actual size, assemble its tiles and measure its calibration ruler. For machine cutting, confirm scale, assigned operations and your own material settings before running the job.
What was checked: this DXF was imported through Inkscape 1.4.2 on Windows and exported as a plain SVG. Both arc radii agreed with the source DXF within 0.001 mm. The imported drawing retained the black outline and blue guide geometry, but named DXF layers are not claimed to survive a plain SVG conversion. LightBurn import, machine cutting and physical fabrication have not been tested.
See it unroll
Offset cones are different
Everything above assumes both ends share one axis. If the small end is shifted sideways, as in an eccentric reducer, the sides no longer meet at one apex at equal distances and the pattern is not an annular sector. That case is developed by triangulation: see eccentric reducer layout.